Posts

Showing posts with the label techinques

Links to design selections for classes

Image
  Happy Day! You can pick from any of the designs on the links below, or choose something from Etsy or Pintrest.  I will let you know if you choose something that is too difficult.  Then email or text a copy of the design you want to do. Thanks,  Jeff - 717-620-9676   Jeff@kurtzinpa.com Color Charts:  <<< My general selection group: <<< Civil War and Underground Railroad  era patterns: <<< Art that has been done in recent classes: <<< Happy painting!

Welcome!

 Good Day, my friend!  Please take a few minutes to see the photos and videos from 5 years of Barn Quilt painting!  It'[s fun and it can be simple.  Just grab a board or something and a couple cans of paint!! My best tools are a square, a straight edge a roll of tape and a sharp knife... AND my imagination. Thanks for visiting, and call any time to share ideas and thoughts.   717-620-9676 Jeff - aka:  TheBarnQuilter.

How to finish a class, or a design project , in three hours!

Image
 The day after a painting class you probably won't remember how many times the blow drier's popped the breaker... or if the air conditioner didn't work, or how much you wanted a glass of water after three hours of stretching tape and squinting to see pencil lines...   But when it's happening it gets frustrating. Like many people say, half way through a bad round of golf..., "This is a stupid game!" Let's look ahead to this weekend and the Barn Quilt painting class you just registered for.  It can go a lot smoother if you keep a few things in mind. A) Arrive on time!  10:00 AM does not mean "whenever I get there."  We usually have 12 people in class,  so being 10 (... 30?!) minutes late means the instructions need to spoken again and again.  Then someone wonders why 2 hours ends at 12:30 instead of noon. B) Read the advance instructions in advance!  I send out the suggestions in advance to give you a chance to anticipate what you are goin...

Sept 19th Claasss at Turner's Table!

Image
This was a fun day!   Lots of light.  Lots of paint and LOTS of smiles!  

Local Barn Quilt map

Image
Local Barn Quilt   map    <<< Click on the link to see the detailed map with photos. Instructions: I will be adding to this map when my students provide an image and location of their Barn Quilts. Pictures and locations can be sent to me at Jeff@KurtzInPA.com  or text to 717-620-9676. If you go for a drive, please respect their privacy. Happy Trails!    Jeff

Review of "Love's Blossom"

Image
  The history of the quilt pattern "Love's Blossom" is fascinating. It originated in the late 19th century, a time when quilting was not only a practical craft but also an expressive art form. The pattern gained popularity during the Victorian era, known for its emphasis on sentimentality and symbolism. "Love's Blossom" embodies these ideals by featuring intricate floral designs, often arranged in a symmetrical layout. The pattern symbolizes the blooming of affection and connection, reflecting the societal values of the time. As quilting evolved through the 20th century, "Love's Blossom" remained a cherished design, passed down through generations as a testament to enduring love and relationships. Its timeless appeal continues to captivate modern quilters, including yourself, as you bring this historical motif to life with your unique Barn Quilt painting techniques. Your work truly pays homage to the rich legacy of this pattern while adding you...

A little history of Barn Quilts

  A Little History about Barn Quilts: Barn quilts have a rich history that dates back to the mid-20th century. The term "barn quilt" originated from the decorative quilt patterns that were painted on wooden boards and hung on barns, primarily in rural communities. The movement gained momentum in the early 2000s, with the goal of celebrating the agricultural heritage and artistic talents of local communities. It's believed that Donna Sue Groves of Ohio is credited with starting the modern barn quilt movement in 2001, inspired by her mother's quilting. The idea was to use quilt block patterns as a form of public art, adding color and creativity to rural landscapes. Barn quilts often hold significance to the area where they're displayed, telling stories about the region's history, culture, or the families that reside there. They've become a way to bring people together, fostering a sense of pride and unity. Your expertise in art and engineering could have a u...

Title: "Simulated Origami: The Soulful Fusion of Red, Blue, and White"Description: This captivating image showcases an exquisite painting that beautifully incorporates the concept of origami through vibrant colors and precise geometric shapes. The canvas is adorned with a visually stunning arrangement consisting of a captivating red, blue, and white square. Within this innovative design, the artist masterfully combines the elegance of traditional origami with the versatility of abstract art, resulting in a truly mesmerizing visual experience.Capturing the essence of origami's meticulous folds, the painting draws the viewer's gaze towards the skilfully crafted paper-like squares, each representing a separate facet of the artwork's story. The intense shades of red, symbolizing passion and vitality, exude a magnetic energy, drawing viewers deeper into the composition. Contrasting against the intensity of red, the deep blue square creates a soothing and meditative atmosphere. Symbolizing serenity and tranquility, it adds a sense of calmness to the overall composition. Its placement within the arrangement ensures a harmonious balance between vibrant passion and serene contemplation.Finally, the white square, an emblem of purity and simplicity, provides a striking contrast against the vibrant red and blue hues. It signifies a blank canvas, inviting viewers to explore their own interpretations and emotions within the artwork's intricate folds. The seamless integration of these three squares showcases the artist's ability to harmonize contrasting elements, fostering a sense of unity and cohesion.With its visually captivating design and the underlying symbolism of origami's artistry and tradition, "Simulated Origami: The Soulful Fusion of Red, Blue, and White" mesmerizes viewers, encouraging them to delve deeper into the artist's profound exploration of color, shape, and emotion.

Image
Artwork Review: "Simulated Origami"                   Introduction: This report presents an analysis and critique of the artwork titled "Simulated Origami," created by Jeff, a skilled artist specializing in Barn Quilt painting. The artwork was assessed based on its visual elements, composition, and overall impression. Visual Elements: "Simulated Origami" captures attention through a skillful combination of geometric patterns and vibrant colors. The intricate design features intricate folds reminiscent of origami, adding a sense of depth and texture to the piece. The color palette chosen exhibits a thoughtful selection, enhancing the visual appeal and creating a harmonious balance within the artwork. Composition: The composition of "Simulated Origami" is marked by a deliberate symmetry that draws the viewer's eye towards the central focal point. The arrangement of geometric shapes and patterns cr...

Sunflower!

Image
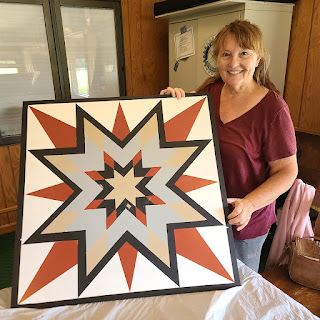
36" Square.  Was fun!  Sold at John A. Logan College Quilt show.

More about applying a thin coat of paint.

Image
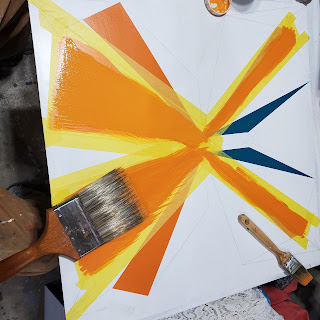
 If you want to get things done quickly, one of the biggest things you can do is to apply VERY thin coats of paint. A thin coat will dry within minutes, particularly with a blow dryer.  If you apply paint like it was peanut butter, you aren't going to get home for dinner... Here/s a video demonstration: Thin coat video

Organizing a BQ painting class.

Image
  Good Morning! People often as me to provide info on a barn quilt painting class for your Guild.  Here goes: The attached cover letter *see below) is how I introduce a class to individuals.  I just change the name and date and any special features of that particular class. All I need is a date, address and logo or image representing your group.  I like to have groups  of 8 to 12 people.  We can do larger groups, but answering everyone's questions can take a bit of time.  We will need a room with tables and space.  I bring tablecloths and drop cloths (if desired).  Class length is different for every individual.   I have had people sitting side by side doing the same design and one took two hours and the other took 4 hours.  Some times the difference is the slower person applying too much paint, and sometimes it's just the nature of the individuals. It's best to try to allow up to 6 hours.  If someone doesn't finish a pain...

Jeff's tips for painting barn quilts

  Tips for better painting:                                                                     Jeff Kurtz   8/14/22  Paint can start to dry (skin over) in as little as 8 seconds.  If you feel your brush start to “drag” when painting over a previous stroke, you should stop, put more paint on the brush, and move to an adjacent area to continue painting.  Brushing over a “skinned” area can leave deep brush marks.  Once the design is laid out, start by erasing the lines before you apply tape.  Pencil marks can bleed and show through several layers of paint. Special tip!  This helps avoid paint bleeding under the tape.  Use a thin coat of clear finish to coat the edges of new tape areas.  Bleeds are practically eliminated.  Seem like an extra step?  Thank me later…...

Avoid getting lost...

Image
   OK, I know the lighting is bad, but the illustration is clear.  All those lines, triangles, parallelograms... It's difficult to figure out, much less remember, which cell gets what color.   Try this before you even start taping off edges... Starting with one color, put a little piece of tape (I like blue so it stands out from the yellow) on each cell that will be that color.  Only do one color at a time.  This will help you identify the cells and get the tape on the outside of the cell. Now you can start with the varnish and paint and make fewer mistakes of where things go. Happy painting!    Jeff

Use the widest brush

Image
  Many distracting and unnecessary brush marks come from using a brush that is much narrower than the area being painted.  In the photo, the 4" wide brush leaves only one stroke on the cell being painted.  The one inch brush leaves only one stroke on the area to the right. Using the 1" brush, or even worse, a 1/2" brush on the large area to the left would take 6 - 8 strokes of the brush. Each stroke creates narrow uneven thicknesses of paint, which must be covered by second and multiple coats of paint.  The result is a surface that looks like thick peanut butter.  On exterior panels these distractions disappear with distance, but indoor displays are viewed close enough that the texture can distract from the image. In addition, Thick coats of paint are more likely to chip or peal after tome passes. Save yourself time and improve results by using wide brushes. Happy Painting! Jeff - TheBarnQuilter

The Greenbriar Gallery

Image
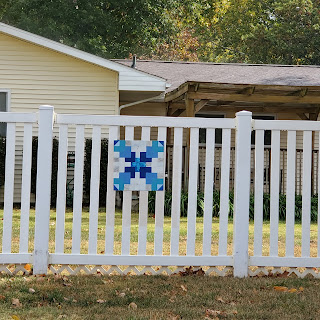
No barn, you say?   https://photos.app.goo.gl/1wmVp6UUDMvHq5b87 <<< Complete gallery. These are Barn Quilt paiintings I have done over the past two years. My neighbors in the Greenbriar Subdivision of Carterville, IL, agreed to let me post and update my gallery every six months. There are about 10 designs on display.

New Facebook page...

Yes, I got busted for too many political posts... oh well... My new page on FB is HERE I hope to see you there! Jeff

Photos from all painting classes

  Link to photos <<< There are quite a few photos here, but it will give you an idea what classes are like. Thanks for asking! Jeff